| The MountPoint | Photo Album | Chuck | The Bus | CFI |  |
|
|
|
|
| Several years ago I realized that I was working too darn hard and was unable to relax. I realized that if I didn't learn to relax, I was going to have problems. So I decided to get a hobby. When I was a kid I had an HO scale model railroad on a 4X8 sheet of plywood. It was nothing more than a figure 8 with an outside loop of track, but it got me hooked. Now, 20 years later, I am at it again, but this time with N-Scale. | 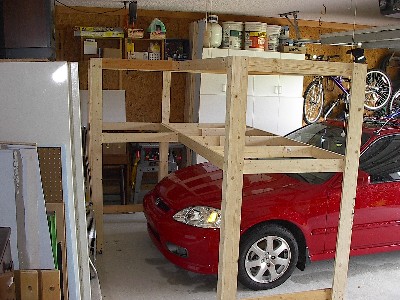 |
|
The basic plan for this layout was to follow two main principles. First, the layout had to be in the
garage and both cars still had to fit in the garage as well. So I built the benchwork to fit over my car.
In other words, I park under the layout. This worked great with my small honda Civic, but would cause a
problem later when I got a bigger car. The second principle was that I would not cut corners just to get
it done, and I resolved myself to take my time and have patience. The biggest problems with the other
layouts I had built was that I did not take the time to do research, test the track thoroughly, or to
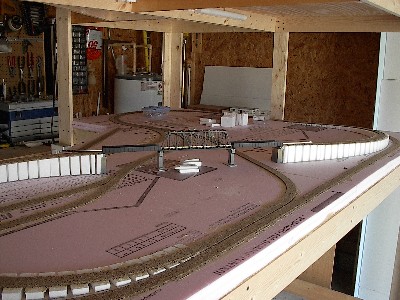
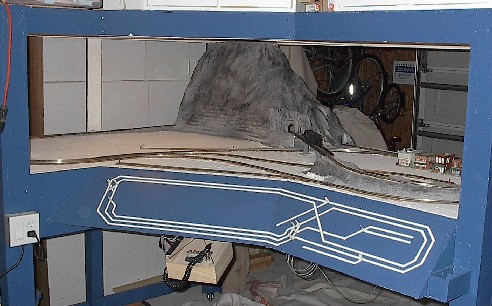
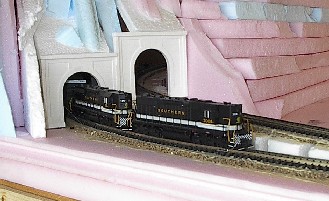
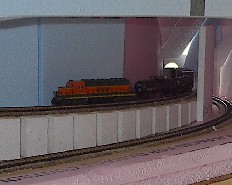
build the structures without being in a hurry to finish. The track plan was the first step. Knowing the amount of space I had to work with I decided that the layout would be on an L shaped table, on wheels to make it easy enough to move around. The basic track plan is for two main lines, an outside loop with an inside figure 8, a small town scene with two spurs, and a scene with a turntable, roundhouse and maintenance area. Since this is a freelanced railroad, I plan to run whatever trains I happen to like that day. Everything from steam engines and modern diesels will roll down these tracks.
|
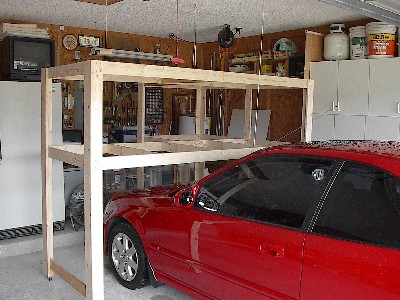 |
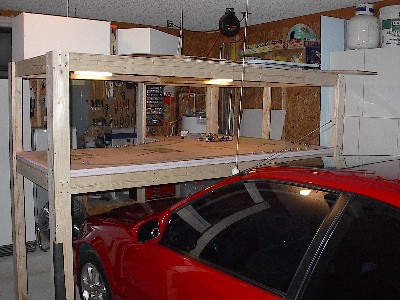
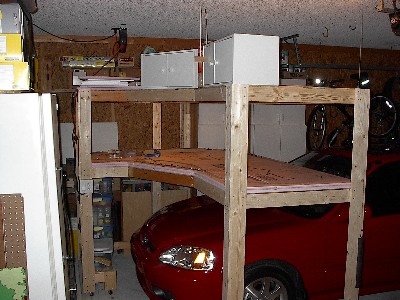
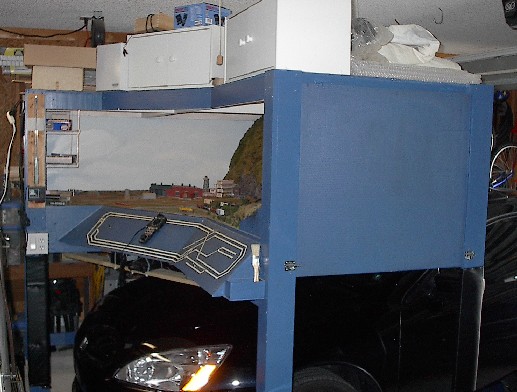
| This shows how the table is designed so that the car parks directly under the main portion of the table. I had a pretty small car at the time, and thougnt that I designed the table so that if I got a larger car the table will accomodate it. It didn't quite work out that way. | 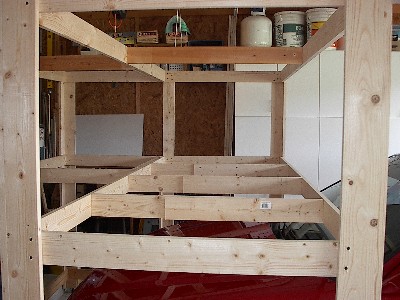 |
 |
 |
|
Knowing that I have to park my car underneath this layout I
built the benchwork out of 1X4 lumber for strength. The legs 8 feet apart so strength
across the table is very important. The table is 47 inches high with 2 inches of foam
insulation board on top of that. The canopy is 74 inches high and holds the lights and
also the cabinets that sit on top that hold everything from trains to modeling supplies. The
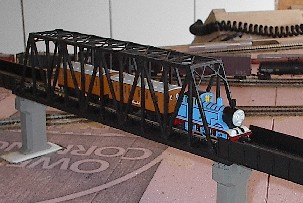
top also makes a good place to store extra foam board and small pieces of lumber. The track sits on cork roadbed and is all PECO flextrack with PECO Electrofrog medium turnouts. Past experience showed me that PECO makes an excellent product but this time I improved my turnouts by wiring around the frogs so that the turnout is not dependant on a good connection between the points and the rail. This means that the turnout is much more reliable. All turnouts are controlled from the control panel with PECO switch machines with SPDT switches attached to the bottom of the machine, which controls the frog polarity. The switch machines are powered by a capacitor discharge unit that I purchased for my last layout. There is also a double sissor crossing so that a train can be switched from the outside loop to the inside figure 8, and visa versa, and a set of three Kato bridges to cross the gap from one mountain to the other. |

|
|
I finally got the plywood top, door skin, and two sheets of 1 inch foam insulation
board down and began to put down the cork roadbed. I also wired in a master switch
with an outlet, that plugs into the extension cord (hanging from the ceiling). Lights
are mounted in the top and wired into the master switch so that they come on when the
switch is turned on. This is not only a convenience, but also lets me know that when
the lights are off, there is no power going to the trains, transformers, or accessories. I finally got most of the cork and risers down, and built the bridges and piers so that I could work on the transition from the bridge to the side of the mountain. Then, finally all of the cork was laid down, except for the train yard which would come later. Next I built the control panel that will hold all the turnout switches and power packs. I used Liquid Nails construction adhesive to glue the track to the cork. I put a small amount of adhesive onto the cork, and spread it out to a very thin layer. Then I position the track and tack it in place with push pins. After a few hours, I twist out the push pins and the track is secured. |
|
|
|
|
|
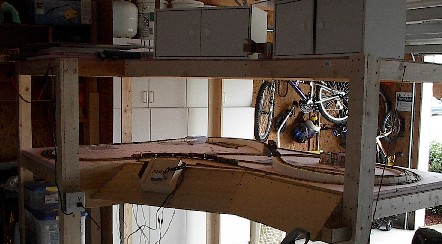
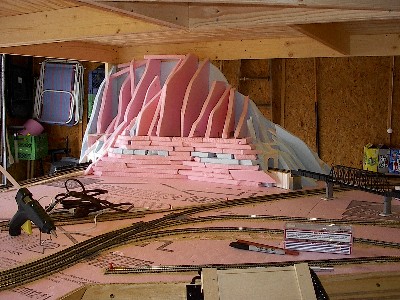
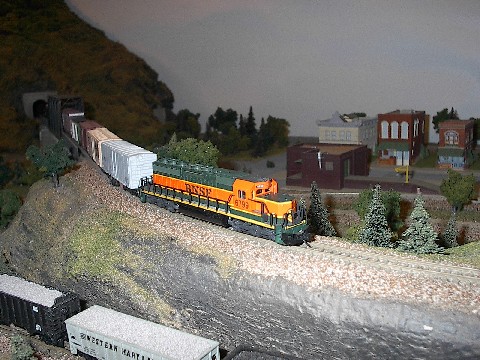
I started the vast majority of the scenery in late December when I went on vacation.
The first step was to build up the mountain. I started with a box around the tunnels
that go around the back of the mountain. These will give the sense of
trains coming out from someplace beyond. I used the same foam insulation board that
I made up the base of the layout and added layers to make it appear that the rock face was
cut away when the roundhouse was built. At the top of the mountain, I
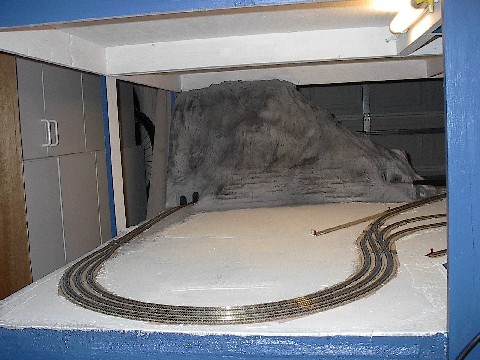
simply cut runners going up and filled in the large gaps. Next I covered the mountain with plaster cloth (the same stuff they made plaster casts of when I was a kid and broke a bone), and plaster of paris on top of that. This made the mountain pretty rugged. I painted the mountain with grey primer and a spash of gloss black (that's what I had on hand) to give some shading. I also took the time to prime the base and cover up all the pink foam board. This will ensure that the base paint will stick later on. Finally, I painted the entire table a blue gray color. |
|
|
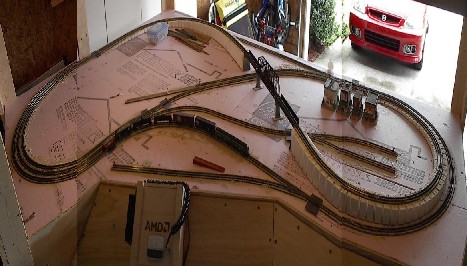
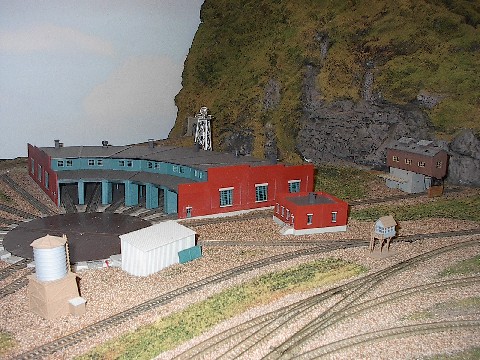
I started doing scenery with the town on the right of the layout and the mountain in
the background. The mountain was pretty easy. I used a rubber mold to create a rock
face, then used polyfill, painted black, as the tree canopy. I used spray adhesive,
hairspray, sand and ground foam to make the polyfill look like treetops. It turned out
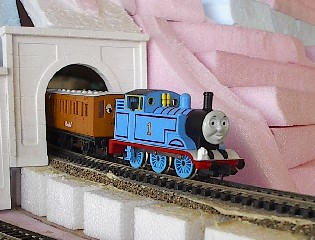
better than I expected. The town is mostly of ceramic houses that I picked up at a clearance sale at Halmark. I did some detail work on them, but for the most part, they are just as they were when I bought them. There is also a warehouse that I built from a kit that fits against one of the sidings. The entire left side of the layout was left for the roundhouse and turntable that I was going to put in later. Later turned out to be 2 years. It started out as a sunken turntable and roundhouse, a cornerstone kit. I installed it, wired it, and tried to get it working, but had a really dificult time getting it indexed. After an entire vacation trying to get it working, I broke down and installed the Atlas roundhouse and turntable. It works flawlessly and after a little detailing, it looks pretty good also. |
|

|
|
|
Earlier I said that my Civic fit under the train table with noproblem and that I
had plenty of room for a bigger car. Well, in 2004 I got a new car, a Honda
Accord. It would not fit under the table. I raised it more than 7 inches and
now the car barely fits. I added foam rubber pads to the legs, especially to the
one directly in front of the car, to protect the car if I accidentally touch the
table. As of this writing I have not hit the end of the table (knocking on wood
now). I also finally added the DCC unit that I wanted. I can now run more than one train, which is great. I'm trying to fight off the urge to pull a Gomez Addams and run the trains into each other head on. The top of the table has become a holding place for just about everything, chain saw, scrap wood, blankets for covering plants in winter, etc. I did add a couple of small cabinets that I have been keeping a lot of my train stuff in. When the table was shorter it fit nicely under the garage door opener. After the lift, it is about 1/2 an inch short, so moving the table has to be done very carefully. |
|
| For the most part the layout is complete. There is always more room for details, and I will be working on that for a while. I also have some tweaking to do with the DCC and a lot of decoders to install. | |
|
|
|
 |
 |
 |
 |
 |
 |
|
|
|
 |
|